[ad_1]
Ceramic tile set up might be hard. Fantastic setting up and a thorough strategy are crucial for effective tiling jobs. Ahead of you start out, take the time to total the correct amount of preparation function. As the ceramic mosaic tile installation expert services company, AG Tiling Northampton appreciates the best practices. In this short article, we go over the technique of putting in ceramic tiles.
STEP 1: Evaluate
Begin by examining the spot where by the ceramic mosaic tile set up will be carried out. The substrate, or the surface area on which the tile is set, is equally as important as the tile by itself. Broken tiles and failing grout may be triggered by a bending floor or an uneven wall.
Below tile that is expected to turn into soaked, use a drinking water-resistant backer board fairly than drywall (shower partitions and bathroom flooring, for illustration). The substrate, regardless of whether it is backer board, plywood, or concrete, will have to be sound, clear, and dimensionally steady. Surfaces should be level, plumb, and correct to the aircraft, as our professional tilers say—that is, there ought to be no bumps. Right before tiling the walls or flooring, clear away all wallpaper, loose plaster, flaking paint, peeling tiles, and unsecured sheet flooring.
STEP 2: Take measurements
-Wall tiling
When tiling a wall, you will want to get started with a amount topline. Because several partitions are beautifully plumb, mark the leading line employing a level. To make it flush with the floor, set it at a height that helps prevent you from getting to lower very thin tiles (or quite slim shards from just about total tiles). Make a leading line and then a center line on your walls. Make sure you have laid out all of the partitions you desire to tile ahead of you begin tiling.
-Floor tiling
Uncover the center of the floor initially to make your finished ceramic tile floor feel symmetrical (even if it is not). Then acquire measurements from both sides. If you’re tiling a little house, pay back more consideration to this step due to the fact wide tiles on a person edge and thin tiles on the other will make the work appear unbalanced.
STEP 3: Set up the tiles.
Lay the tiles out to see how they will glance once you’ve founded the heart issue and leveled the spot for floor installations (or established the prime line amount for wall installations). In every single quadrant of the grid, permit it dry prior to mixing the glue or mortar.
The distance amongst tiles really should be constant. If your tiles are not on mesh sheets, use spacers. The larger the tile, the more substantial the gap involving them must be. To do away with grout strains, some do-it-yourselfers make the mistake of urgent tiles also close together.
STEP 4: Working with a tile cutter
The first phase in slicing tile is to measure the measurement of the tile you want to minimize and then use a tile cutter to reduce it a felt-tip marker to imprint the proportions to the glazed floor of the tile. Position the tile on the tile cutter, aligning the cutter’s centerline with the axis that the tile will be cut on. The best of the tile really should be flush with the fence at the top rated of the cutter to retain it sq.. Then, utilizing the lever linked to the cutting wheel, drag the cutter across the tile’s surface area, working with strong, equivalent pressure. With the cutter, make only just one go. Last but not minimum, snap the tile.
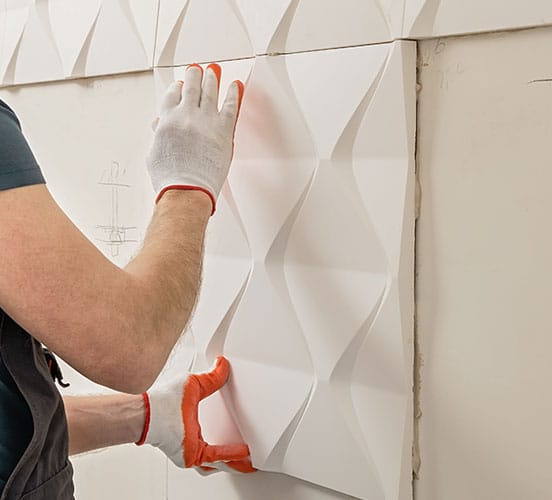
STEP 5: Placing the tiles collectively
If you’re using tile, it is almost certainly in a place where by dampness is a given—the kitchen, the bathroom, the lobby, and so on. Make selected you use a water-resistant adhesive. You may possibly use a mortar or a premixed glue, but if you go with the latter, make positive it’s a slender-set wide range.
STEP 6: Tile grouting
Grout is typically bought as a powder that have to be combined with h2o or an additive. Read the packaging recommendations or search for assist at the tile retailer. Wear gloves and uniformly distribute the grout, being mindful to use a blunt adhere or a different instrument to thrust it into the joints.
STEP 7: Cleanse and seal the area
Make absolutely sure the residue on the tiles’ surface area is sponged off in advance of it has a chance to dry. This phase will take an hour or more to entire for the reason that it will demand various passes. When doing the job with tiles that have a porous or variegated floor, this is a vital stage. It can be almost hard to eliminate dried grout from indentations.
You can implement grouter in accordance to the manufacturer’s tips or you can as us. Professional tilers of AG Tiling Northampton know what is finest for our clients. For additional information about the ceramic mosaic tile installation process, get in touch with us now!
[ad_2]